weChook Racing: Electric 3Galoo Build Log – Building the ‘mono-coffin’ continued
Success, a second blog post about actually building the car, perhaps we are on a roll….
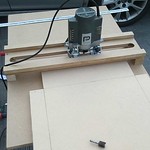
Last night Matt and I got home from work and cracked on prepping our Divinycell panels for gluing. Matt cracked on with a file and some sand paper to neaten some of the edges that we would be bonding to. While he was doing this I got to work building a simple router planer machine.
We needed to be trim the floor pieces down from 20mm thickness to 15mm, and the front panel would need to be 10mm. We have tried in the past using a home made hot wire to cut the foam in large sections however, doing such wide panels results in the wire deflecting a lot inside the foam which means we often end up with a wave like pattern in our foam, not ideal for keeping a nice flat floor! The router planer would remove/destroy more material than the hot wire method, but this wouldn’t matter as we are only removing a small amount.


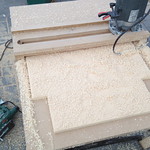
Pushing the panel in from one end I then move the router across, removing 1 router bits worth of material per stroke. 10mins and ALOT of foam mess later (have a shop vac and dust mask to hand here!) and the panel is trimmed. A quick pass with some sandpaper and we have a panel that is thinner and ready for bonding to the rest of the chassis.
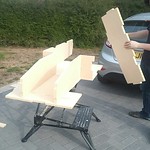
Now that the panels are the correct size and thickness Matt is able to throw them together as seen here. Next up, gluing the chassis together.

Leave a Reply