Mazda 3 – Shoddy Seat Fixing

Whilst fixing some bike wheels for the Driven project Rowan, a member of the team, mentioned that he had recently been having some problems with his nearly new (well at least in terms of my car history!) Mazda 3. Specifically he had a drivers seat mounting that had failed causing the whole seat to rock around with over and inch of play.

We decided that this should be a nice quick fix and a good excuse to whip out the welding gear. I have written this up purely becuase the terrible quality of these seats makes me feel that oithers will find theirs fail and may want a quick guide on what to do when this happens!
2014-08-30 16.45.462014-08-30 16.59.48

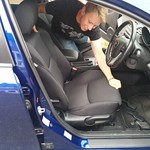
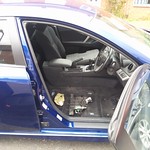
The seat came out quickly with 4 bolts in the corners, the most time consuming part was actually trying to disconnect the airbag/heated seat connector found underneath the squab (not so hard once you work out how the connector works, just play around a little).

2014-08-30 17.03.522014-08-30 17.03.37

Once we had the seat out we could assess the damage. Rowan had told me already that he had already had to use a jubilee clip to hold the rails on to the pins, this appears to be where the sprung washers have failed and gotten lost. They don’t seem to be easy to find in the correct sizes and a jubilee clip appears to function well enough for now. (Example photos are above of a ‘good’ rod connection to the rail and a slightly more custom one)
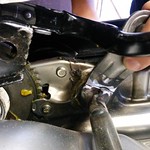
2014-08-30 17.03.302014-08-30 17.06.042014-08-30 17.14.12

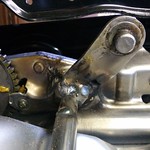
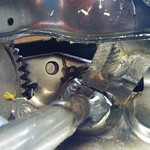
The pictures above show where the bracket has failed. It’s difficult to see from but this section connects the main seat base the rails. It is hard to believe this has failed. It is eaily 4mm thick steel and it hasn’t failed around a weld or joint. With a bucket of water on hand and using some leathers to protect the seat cushion I used my Black & Decker Powerfile to clean the metal (excellent tool) and then used the mig to set it back in place. Once the part had cooled we put the seat back together and back in to the car. In true haynes style this process was reverse of removal and just like that the seat was solid again.

Gear Indicator – MGZR Rally Car – Version 2

Wow it’s been a long time since I posted here apologies, I’ve just been doing a lot of engineering…..which I will now attempt to write up from scraps of paper and numerous logbooks.

After a successful set up running for a few journeys, counting gears and displaying them correctly, Adam has been having some issues with the gear indicator that I made for him. A quick diagnosis showed that some of the power supply debouncing caps had been rattled loose (rally cars are a harsh environment to engineer for!) which was causing some spurious switch presses to be seen by the msp430. This problem quickly manifested itself by counting gears erroneously.

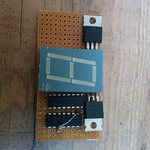
While we were fixing the issue I decided it would be best to ‘re-invent’ the gear indicator system now that we understood Adams requirements a little better. Firstly we decided to go for a much larger 7 segment display, choosing a 25.4mm model that required a 5V forward voltage (2 series LEDs per segment). This is both bigger and brighter which will help Adam see the display in future events. This added some complication as the msp430 on the board runs a 3V3. To get around this I dug around my electronics collection and found a uln2004a (transistor array from TI), this allowed me to switch the 7 segment easily using the msp430 GPIO. As can be seen in the pictures 2 LDOs are now required but the main design hasn’t changed significantly.

IMG_20140727_160358IMG_20140727_160403

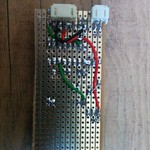
The extra ICs (plus the fact we wanted a more robust solution!) has meant that for V2 I have switched to using breadboard. I should have done this in the first place really but hadn’t appreciated how much space I had to play with behind the dash. Note to self: fully understand requirements before inventing a solution. Hopefully this will mean the indicator will be less susceptible to vibration.

I also found some bugs in the code where I was setting up ports for the LED. These have now been fixed and the latest code has been uploaded below. Hopefully this final design will suit Adam’s needs, I will keep you up to date with his progress.

GearIndicator_source_V2

Gear Indicator – MGZR Rally Car (part 2 – Installation)

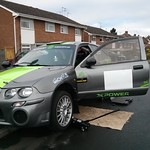
During one of our many days off work (must be taken before the end of the year) Adam and I finally got around to installing the Gear Indicator in his rally car. Since Adam put in the request for this project back in March he has crashed and subsequently repaired the entire front end of the car. Not great news for him but every cloud has a silver lining, and the great news for me is that Adam has put some weChook graphics on the newly painted wings.

IMG_20131127_102524.jpgIMG_20131127_102519.jpgIMG_20131127_102511.jpg

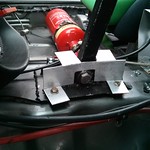
The final step in getting the indicator working in the vehicle was designing a bracket to hold the microswitches in position around the gear lever. Some experimentation and we settled on a design made from a single aluminium plate that utilised the bolt holes already holding the selector bracket.

Once the microscwithes were mounted on the plate and the wiring tidyied we powered the indicator on (from a spare 12V fused feed) and went for a test drive. The indicator worked perfectly when the engine wasn’t running however, alternator noise on the power lines sometimes led to miscounted gear shifts when we drove the car. Note to self: cars are an incredibly noisey environment so make sure to add smoothing capacitors before you pot any projects. Fortunately with this modification the device seems to work perfectly and Adam hopes to test it out on a rally in the near future.

I have included a couple of videos of us testing the indicator:

Gear Indicator – MGZR Rally Car

It’s been a while since I have posted on the blog. The Driven Telemetry and Control project I am working on is taking up a lot of my time (now I have taken the role as Electrical team lead) and as such I have spent almost no time on the eCumbent or the Tandem.

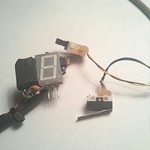
Fortunately I found some time this evening to finally complete this little project so thought I best update weChook before my time is further absorbed. A friend of mine, Adam, has recently purchased a rally prep’d MG ZR complete with a sequential gearbox. Though the box seems fantastic and allows him to shift quickly through the gears he currently has no way of knowing which gear he is in, since the lever is a simple push pull type.522090_10151383225391914_1086446565_nThis quick project will hopefully help him with the confusion. A simple up down counter implemented using an MSP430G2211 increments and decrements through the use of 2 micro switches. These will be fixed at the base of the gear lever. The output is handled by a 7 segment LED display (blue, of course) which shows the current gear (Gears: n, 1, 2, 3, 4, 5, 6). Since joining Jaguar Land Rover and discovering the beauty of ‘surprise and delight’ features I have incorporated a gimmick in to this project: it spells out the drivers name at initialization.Gear IndicatorI haven’t bothered building a PCB for this design as it has so few components. The MSP430 is just soldered to the back of the LED and other components glued around. Adam plans to pot the indicator when we are fully happy with it’s operation anyway.

I have made the following available for this project: Source, Schematic